
Recently, I was asked to write an article for the American Painting Contractor’s monthly magazine so I thought I’d share with you how I go about doing a “touch up.”
The Call
Every now and then I will get a call from a client who had some decorative painting completed and there was some damage done to it either from a leak, a remodel, or perhaps their kids decided to enhance the walls with their artwork. My questions usually are, “Who did the work? Did they leave any samples or extra paint behind?” The more knowledge I have the better I am able to save the client time and myself the headache of trying to recreate the existing finish. If it’s a project that I did for them usually it’s pretty easy to go in and fix it because I can go back and review my notes and formulas. But most of the time is a project where the previous finisher is no longer doing faux or they can’t find the artist’s contact. Touch ups are the hardest thing I am asked to do but also the most rewarding. Other times I am asked to camouflage ugly fixtures to make them disappear; whether it be switch plates that need to go away or a thermostat that stick out like a sore thumb. The process is similar in that I need to match the style or design as well as the sheen of the finish I am matching.
The Diagnosis
I had a client who had some repairs due to new windows put in and in doing so, the contractors damaged the drywall around a window in her office. The previous finisher was either no longer in business or had moved out of state so I was called in to do the repairs. I did some sleuthing and was able to determine the colors and technique used. I only repaired the areas that were damaged and did my best in blending them into the wall.

The Remedy

Matching the base color paint. Usually it’s lighter than the final finished wall.

I hand mixed a color on my palette that would work as a base coat and took a piece of card stock and painted some onto it. I dried it down and held it up to the wall. Squinting my eyes, I could determine whether or not I was on the right track - light vs. dark, cool vs. warm. I adjusted the color as necessary.
Once I got the base color dialed in I then applied a few coats to the damaged areas that were already skimmed out.
Next was getting the glaze color right. Again more trial and error, applying the glaze onto the painted card stock and drying it down before holding it up to the wall.
4. The hardest part was applying the glaze and getting it just right without going over the painted edge so as to not create a halo or “burn” line where the new glaze overlaps onto the existing surface. With a small paintbrush and a lot of patience I applied the glaze, then using another brush I stippled out the surface until I was satisfied. I added a second layer to get it darker and was finally able to step back and not notice the area when looking at the wall as a whole.
The Result

The final result- the drywall was a little wonky but at least the finish matched!
Other Case Studies
Sometimes it’s not a faux finish that we are asked to resurrect. Here is a repair that fellow decorative artist Sharon Leichsenring completed for a client whose wallpaper had been damaged:

With this project Sharon was relying on all of her sharpshooter skills as a decorative painter. When touching up wallpapers, there are two directions the work takes: fixing faded areas because something, like a hanging picture, has been removed. The other is when perhaps an electrical box has been taken out. Her method is to apply adhesive backed mesh to the area, several coats of compound, sand, prime and find a matching base-coat.
(Shown is a previous finisher’s attempt at repairs.)

In this project, she had both types of fixes. She found that she couldn’t tape off the area because the paper was old and the tape pulled the paper. She used Mixol universal tints added to the whitest base of Benjamin Moore Regal Select flat finish. Due to the nuances of this older paper, the application of paint mattered. The background had to be lightly stippled to match the thirty years of aging. Plus the discoloration was uneven, challenging Sharon to adjust her palette as she went along. Prior to Sharon’s arrival, another artist had attempted to repair the paper, however the colors didn’t match and were very noticeable. Expanding the repair to the surrounding areas allowed for the blending and camouflaging of the area, thus saving the client from having to rip out and replace all of the wallpaper.
(Sharon’s magic touch.)
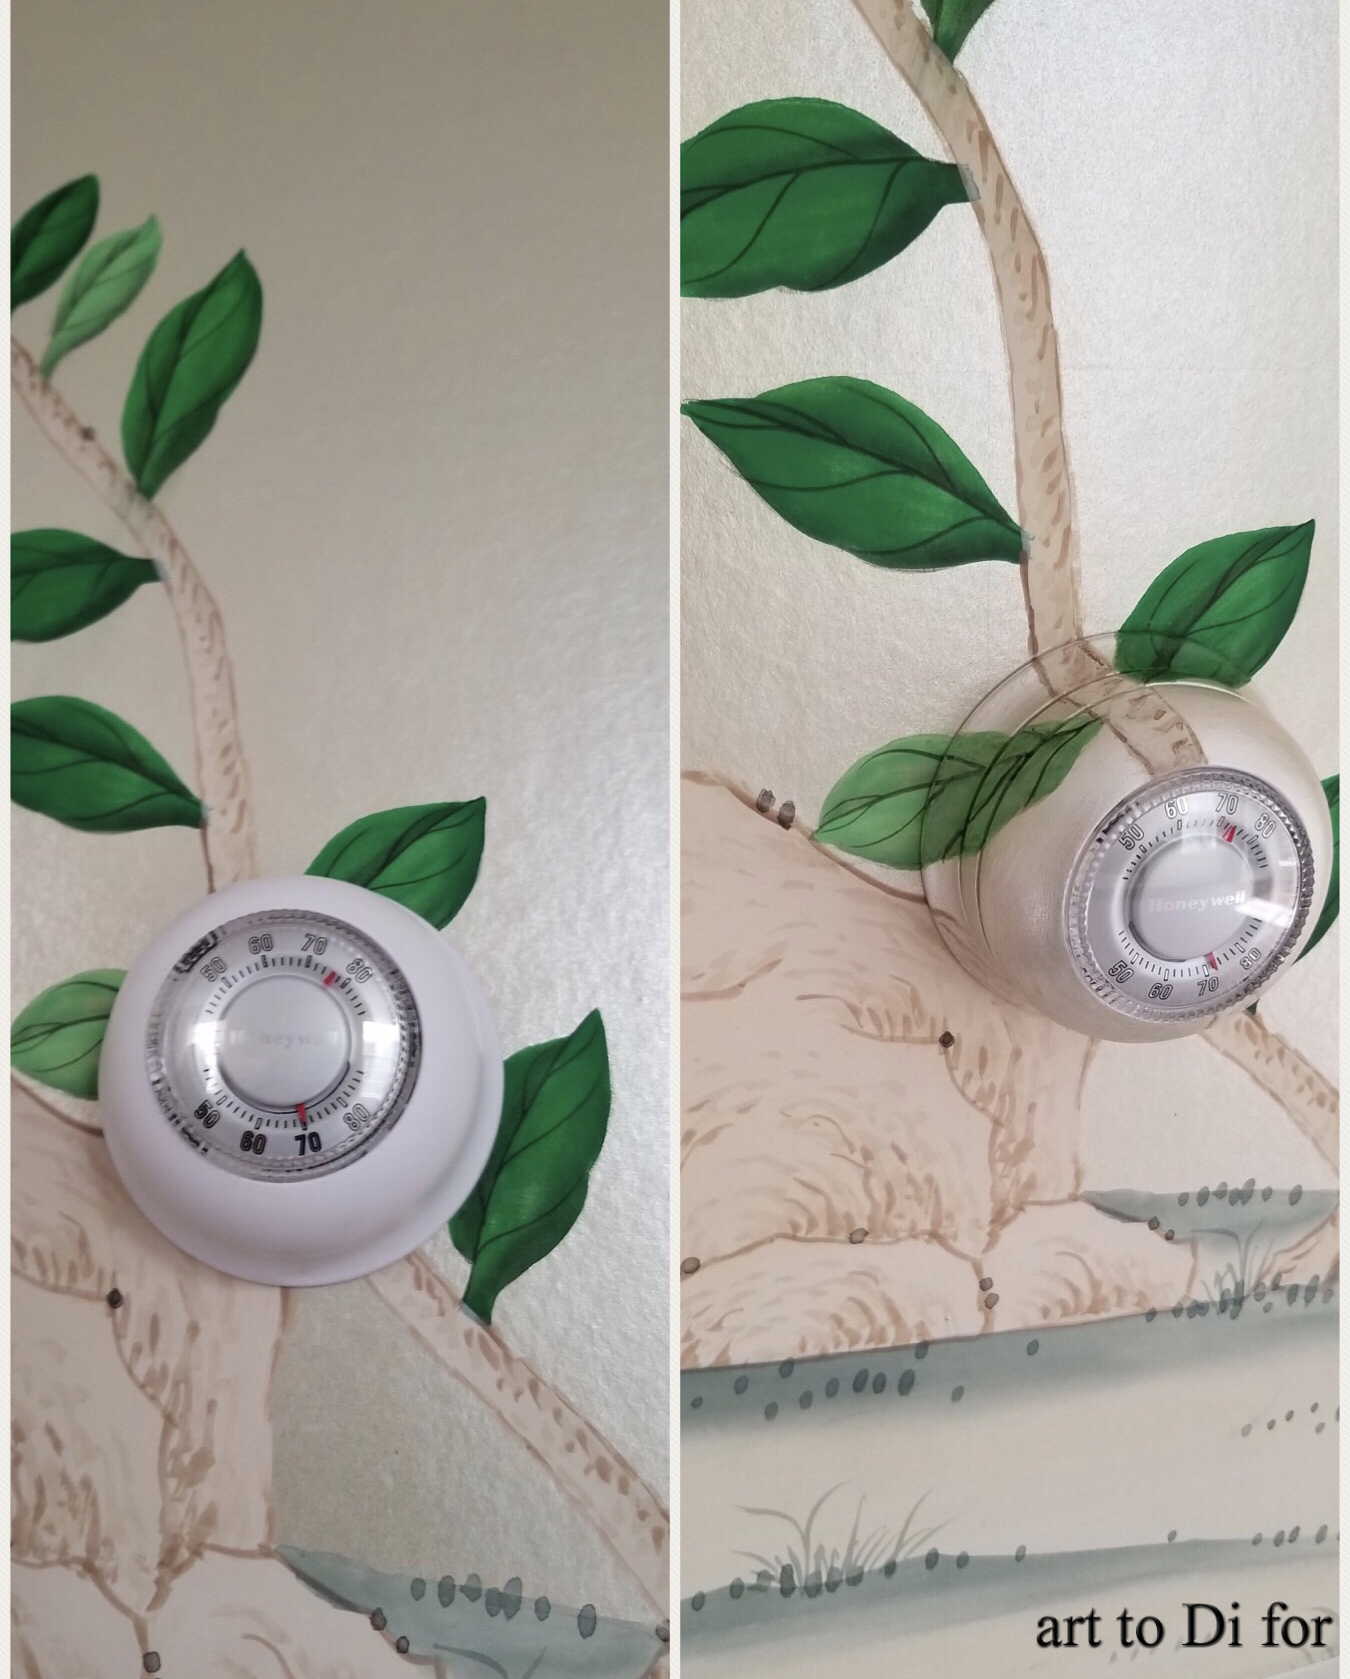
In our final example, our past president of IDAL, Diane Sink Williams was asked to camouflage a thermostat that interrupted the gorgeous DeGournay wallpaper her client had installed. I think she did a pretty fabulous job given the metallic ground and stylized painting technique in the design!
Conclusion
So its not impossible to make repairs to a decorative finish or camouflage unwanted fixtures so that they do not interrupt the eye when gazing upon a beautiful interior but as I have shown it takes practice and careful study in order to make a seamless and unnoticeable repair. Like I always say, “good faux is hard to find” and should be hard to find if done right.